実はね…
実はOGP画像を生成するAPIをHonoで書きました。
理由としてはnuxt-og-image で上手く生成出来なかったから…。
だったんですけどね。
satoriを使うようにした
速さに目が眩んでtakumiを使うようにしたんですけど、フォントが上手く渡せなくてね。
一部が豆腐になったり、日本語フォントが表示されなかったり。
試しにSatoriを使うようにしたんです。そしたら上手くいった。
手順
nuxt-og-imageのインストール

bunx nuxi module add og-imageこれでnuxt-og-imageがインストールされた。
satoriの有効化
bunx nuxt-og-image enable satoriこれでsatoriとその依存関係がインストールされる。
budouxのインストール

bun add budoux日本語を分かち書きしていい感じに改行できるようにしました。
フォントの設定
まず@nuxt/fonts を入れます。
bunx nuxi module add fontsそしたらpublic/fonts にフォントファイルを入れます。日本語のやつだけでOKです。
今回はNoto Sans JPのBoldとMediumを。
続いてnuxt.config.ts を設定します。以下を追加。
fonts: { families: [ { name: "Inter", weights: [500, 700], provider: "google", global: true, preload: true }, { name: "Noto Sans JP", src: "/fonts/NotoSansJP-Bold.ttf", weight: 700, global: true, preload: true }, { name: "Noto Sans JP", src: "/fonts/NotoSansJP-Medium.ttf", weight: 500, global: true, preload: true } ]}コンポーネントの作成
OGP画像用のコンポーネントを作成します。
app/components/OgImage/BlogOg.satori.vue を作成します。
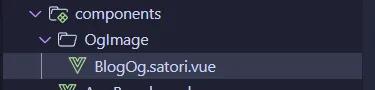
ファイルの中身は以下のように。
<script setup lang="ts">import { loadDefaultJapaneseParser } from "budoux";const props = defineProps<{  title: string;  description: string;}>();const parser = loadDefaultJapaneseParser();
const titleWords = parser.parse(props.title);const descriptionWords = parser.parse(props.description);</script>
<template>  <div class="w-full h-screen flex flex-col justify-center text-gray-950 p-16 relative" :style="{    fontFamily: 'Inter, Noto Sans JP, sans-serif',    background:      'linear-gradient(90deg, rgba(230, 249, 255, 1) 0%, rgba(255, 255, 255, 1) 30%, rgba(255, 255, 255, 1) 100%)',  }">    <div class="flex flex-col">      <div class="flex flex-wrap text-6xl font-bold leading-[1.2] overflow-hidden" style="max-height: calc(1.2em * 3);">        <span v-for="(word, index) in titleWords" :key="index">{{ word }}</span>      </div>      <div class="flex flex-wrap mt-6 text-3xl font-medium text-slate-600 leading-relaxed max-w-[90%] overflow-hidden"        style="max-height: calc(1.625em * 2);">        <span v-for="(word, index) in descriptionWords" :key="index">{{ word }}</span>      </div>    </div>
    <div class="absolute bottom-16 left-16">      <p class="text-2xl font-medium text-gray-800">Your Site Name</p>    </div>  </div></template>
OGP画像を設定
あとはOGP画像を設定したいページに追加していくだけです。
例としてapp/pages/blog/[...slug].vueに。
<script setup lang="ts">// 他の設定
defineOgImage("BlogOg.satori", {  title: post.value?.title,  description: post.value?.description,}, {  emojis: 'twemoji',  fonts: ["Inter", "Noto Sans JP"]})
// 他の設定</script>
これでOK!
確認する
開発サーバーを起動して、プレビューを開きます。
Shift+Alt+Dで開発者メニューを開いて
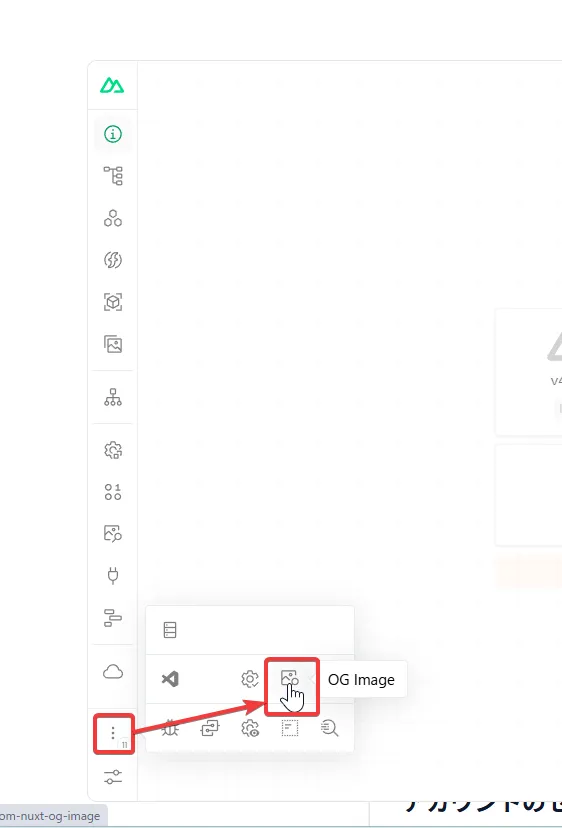
三点リーダー → OG Imageをクリック。
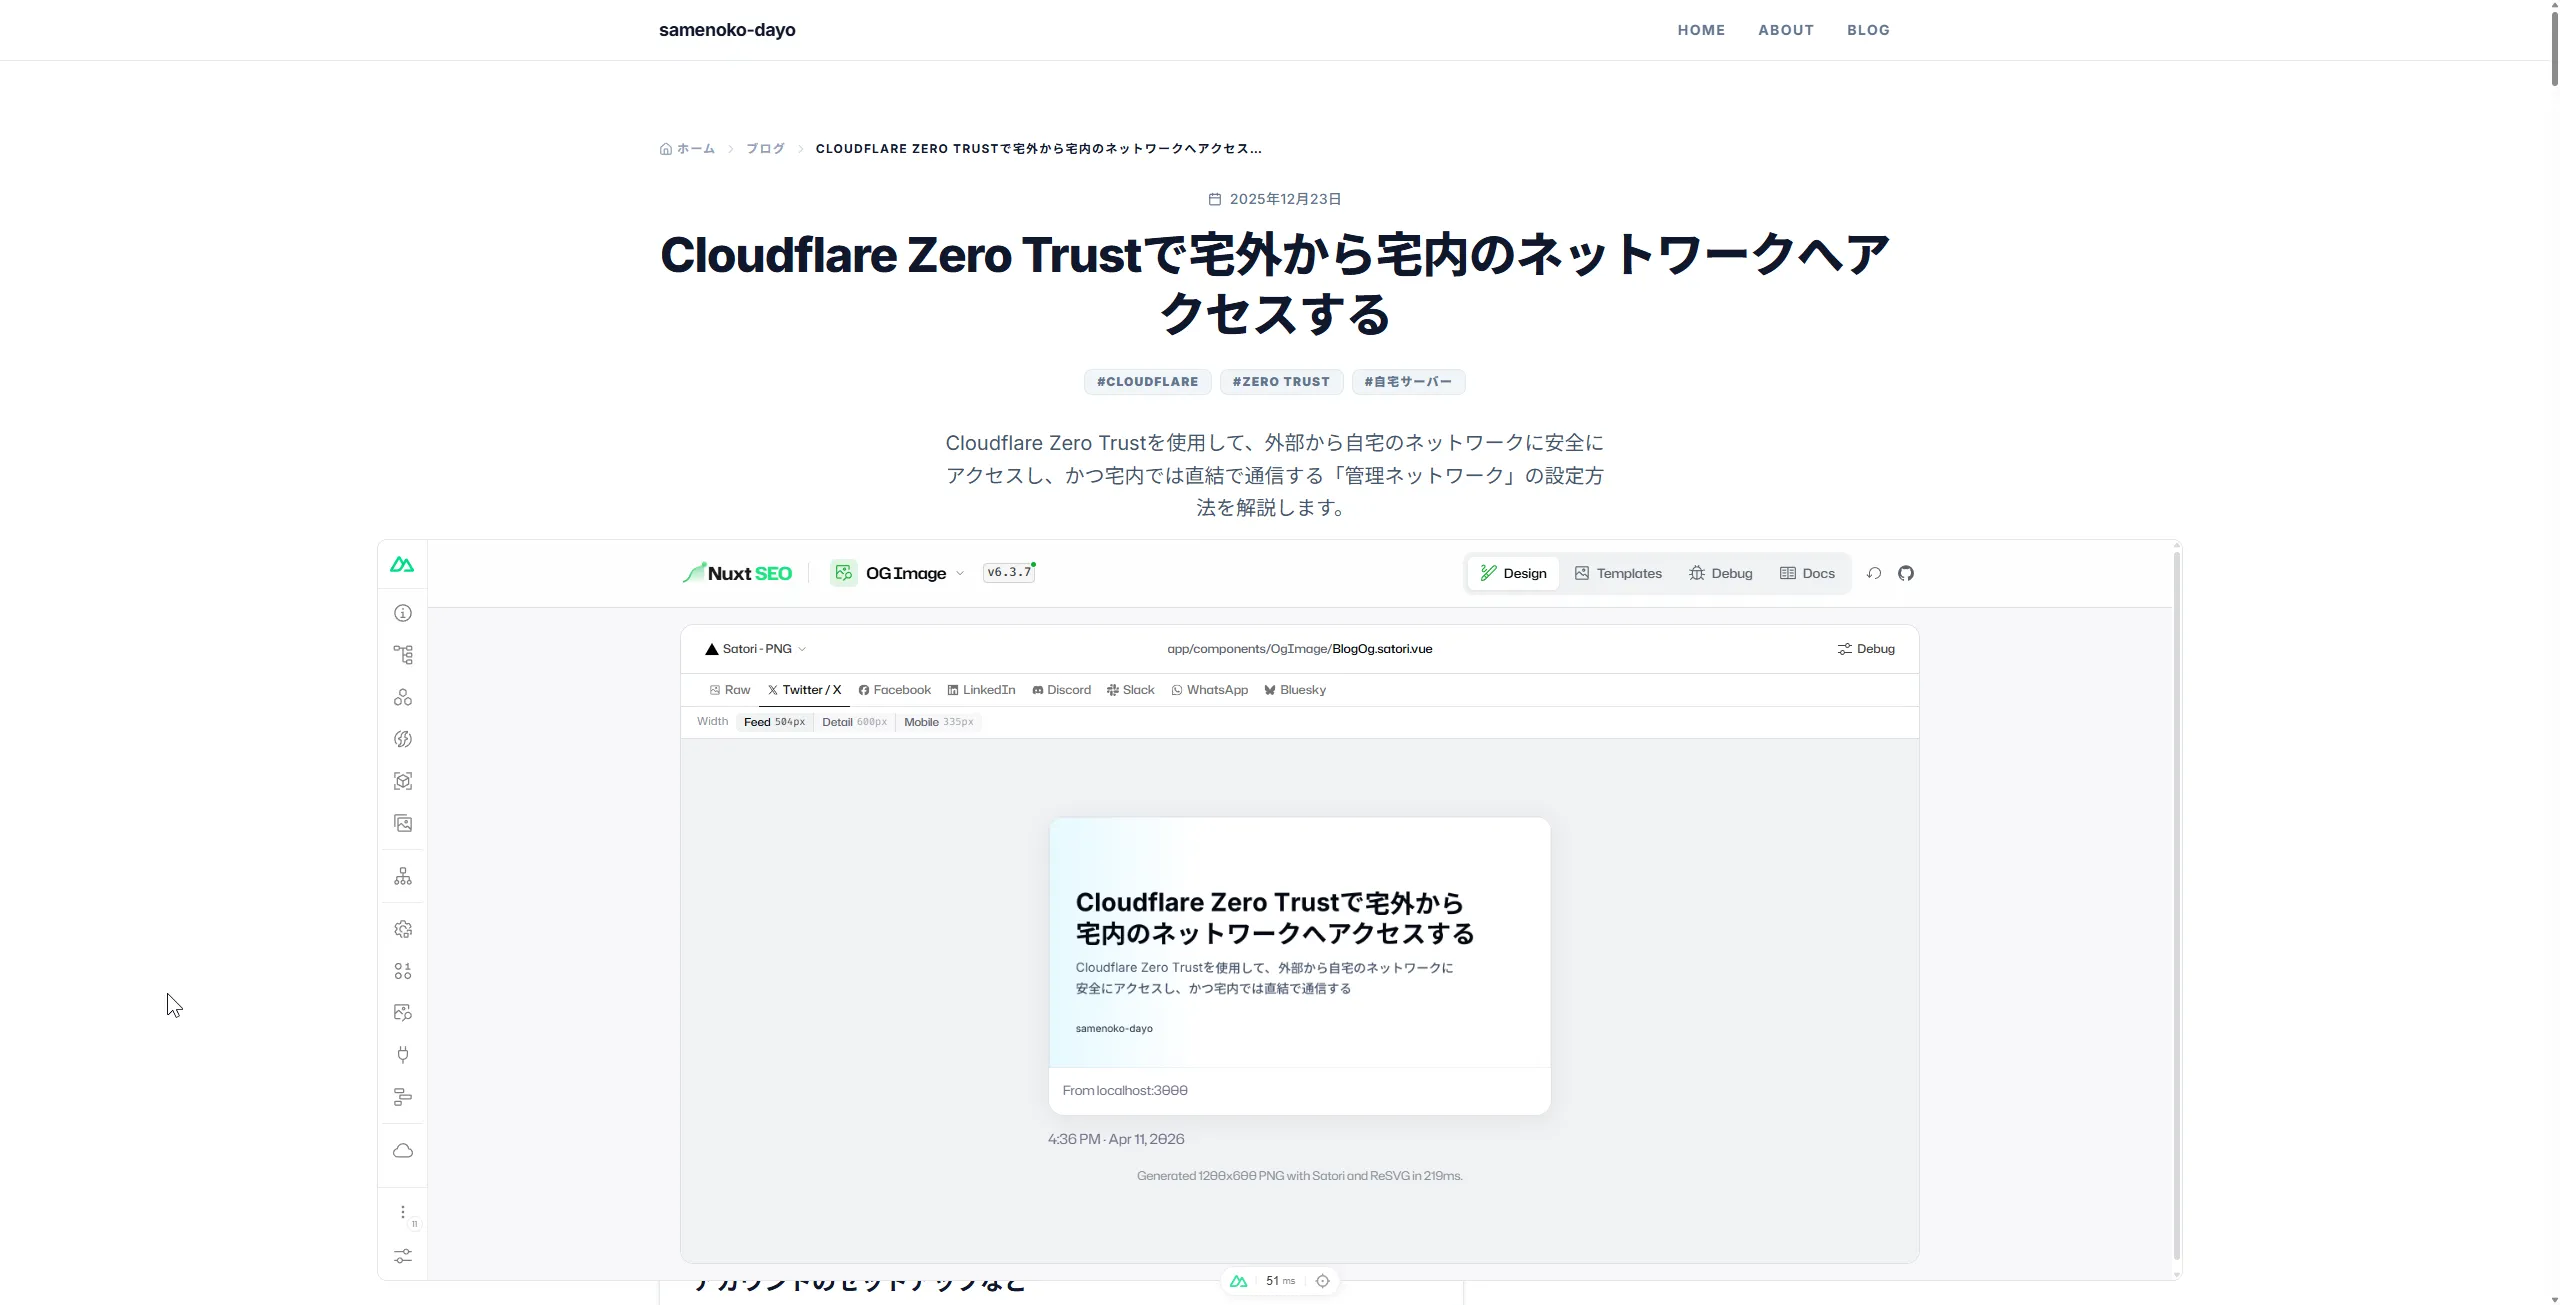
こんな感じでOG画像が生成され、表示されればOKです!
おわり
以上です。
別に速度が遅くなったとかは無いので、ただ単純に便利で楽なだけですね。